
Lifting Light
Create soft light by lifting
Have you ever painted a scene and wished you could add spots of sunlight breaking through the trees? Or wanted to soften an area that’s become too dark? You could try to paint around those bright spots from the beginning, but there’s something rigid about that approach. It doesn’t capture how light actually falls.
This week we’re looking at lifting, a technique that lets you create light after you’ve already laid down colour. It’s different from masking fluid or leaving areas white. Those give you hard, rigid edges. Lifting creates soft transitions that feel more like actual sunlight filtering through.
I use this often in my snow paintings. Lifting lets me adjust the light pattern after I see how the washes have settled. You can’t always plan where those dapples of sunshine should go until you see the painting developing.
Exercises
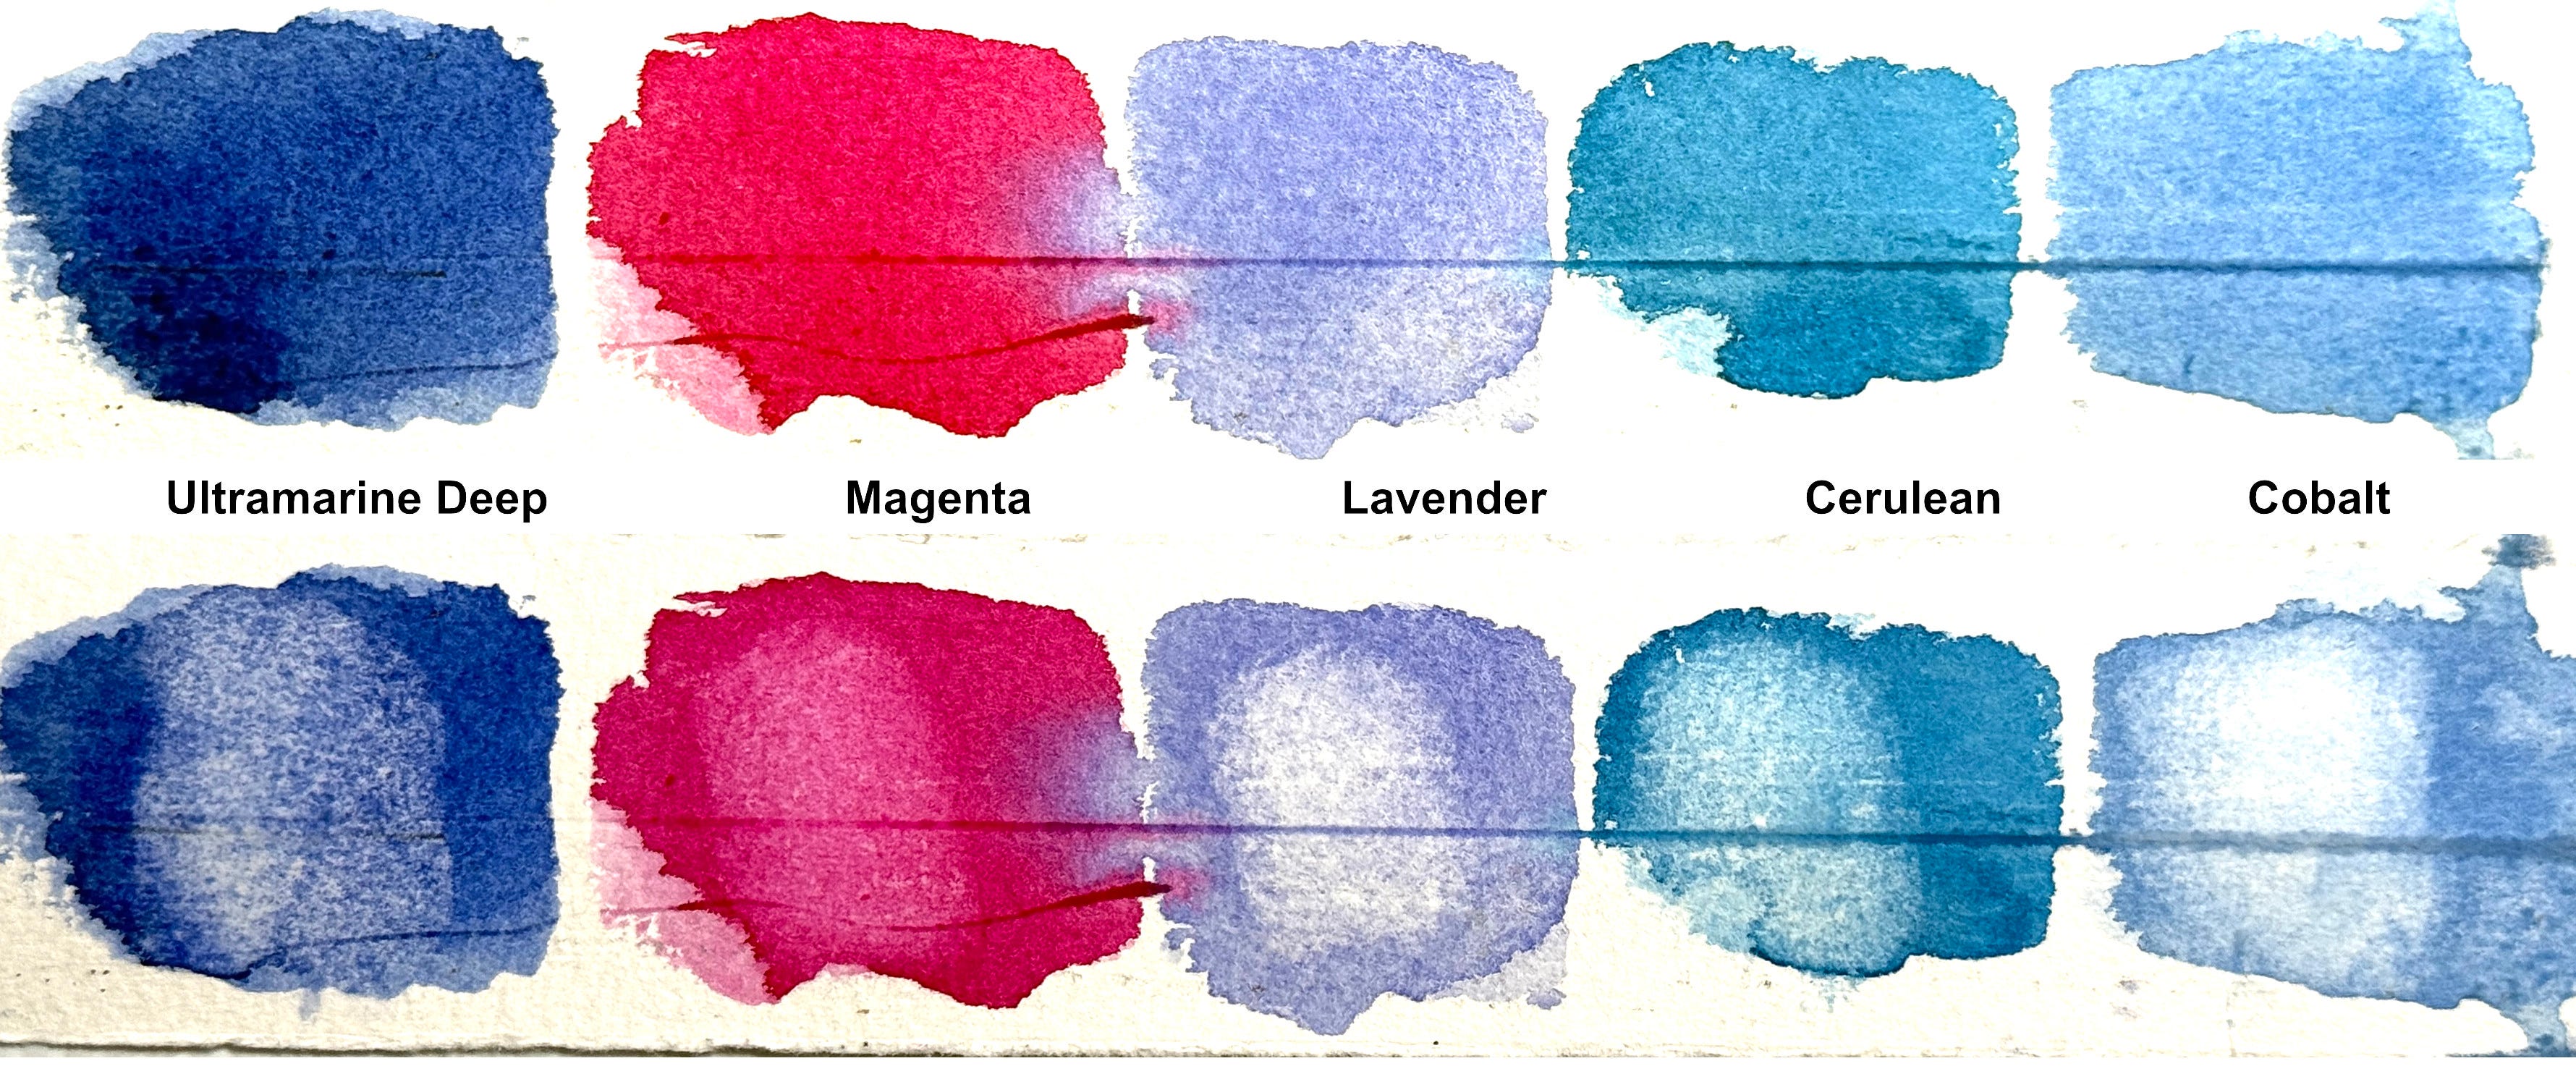
Before we start painting, we need to know which colours will actually lift. Some pigments, like Alizarin Crimson, Phthalo Blue, and Sap Green, stain the paper fibres and are nearly impossible to remove. Others sit more on the surface and lift cleanly.
Test your colours first:
Paint small swatches of the blues you plan to use. Let them dry completely. Then take a damp, stiff synthetic brush and gently scrub a small area. Blot with a tissue.
You’ll immediately see which colours lift well and which don’t. This isn’t wasted time, it’s essential knowledge you’ll use in every painting.
This works best on quality watercolour paper (cotton, 300gsm/140lbs, cold press or rough).
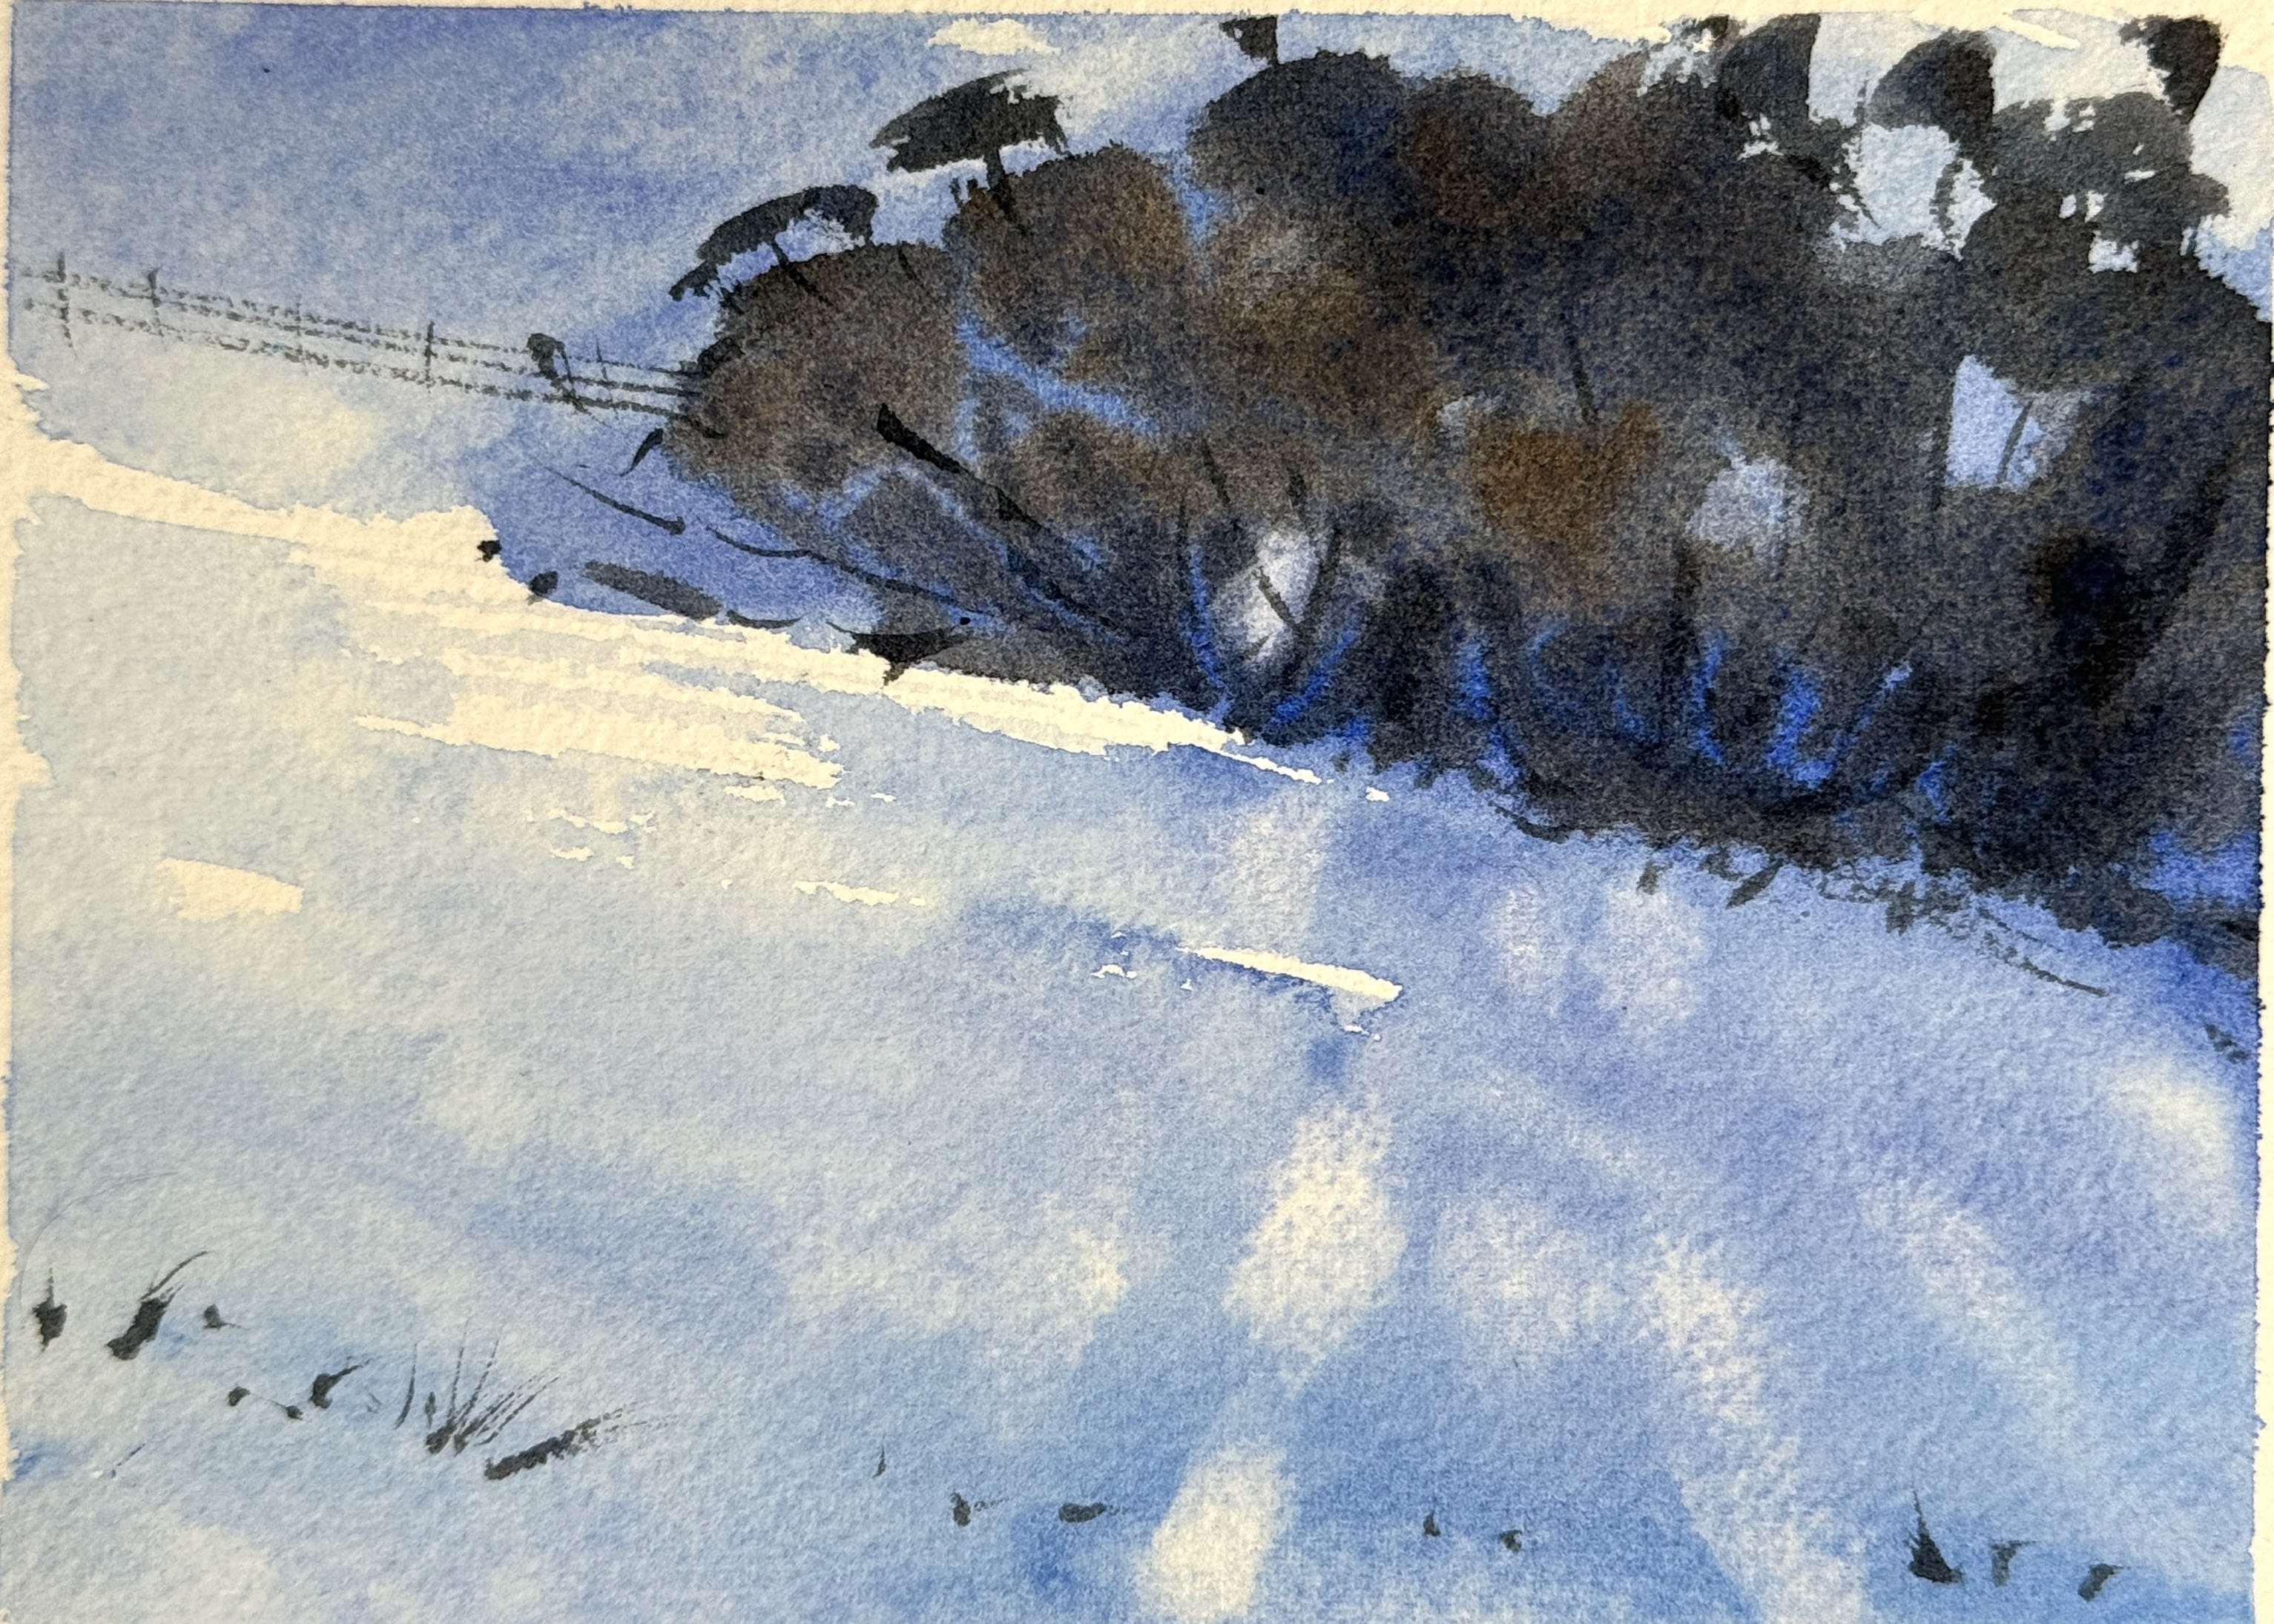
Snow Scene with Sunlight
For this exercise, you’ll create patches of sunlight on snow by lifting out pigment.
You’ll need:
Blues that lift well
Burnt Sienna for mixing darks
A stiff synthetic brush (size 4-6 works well)
Tissue or paper towel for blotting
Steps:
Cover your paper with varied blue washes. Use different strengths, lighter in some areas, slightly darker where the trees will be. You need enough pigment for the lifting to create visible contrast, but don’t go too dark.
When dry mix Burnt Sienna with blue to create a dark, near-black value. Paint your tree shapes.
Now for the main technique. Dampen your synthetic brush with clean water, then blot it on a towel so it’s damp but not dripping. Gently scrub an area where you want sunlight. Use light pressure to loosen the pigment. Immediately blot with a clean tissue, pressing gently.
Repeat this lifting process to create multiple spots of light across your foreground. Think about how sunlight filters through branches. Vary the size and intensity. Some areas might need a second lift to get lighter.
Why
Creates natural, soft light that masking fluid can’t replicate
Lets you adjust as you go instead of planning every highlight in advance
Reveals earlier layers for interesting colour effects
Next up for premium subscribers:
Common problems to avoid
Video tutorial of the exercise with commentary
A bonus video tutorial (7min) of a snow scene using lifting
Master artist spotlight (you don’t know this one)
Ideas for taking this exercise further
We have lift off!
Patrick
