
Find What’s Missing
Exploring Negative Shapes
Last time we connected shapes. This week, we're flipping the script by focusing on what’s around the subject—the negative space. It's a subtle but powerful shift that makes objects "appear" without directly painting them.
Exercise
Find a simple group of objects: Try a few cups and mugs, a bowl of fruit, a stack of books. Or copy my examples below to start with.
Outline only the negative space: Draw the shapes around and in between the objects rather than the objects themselves.
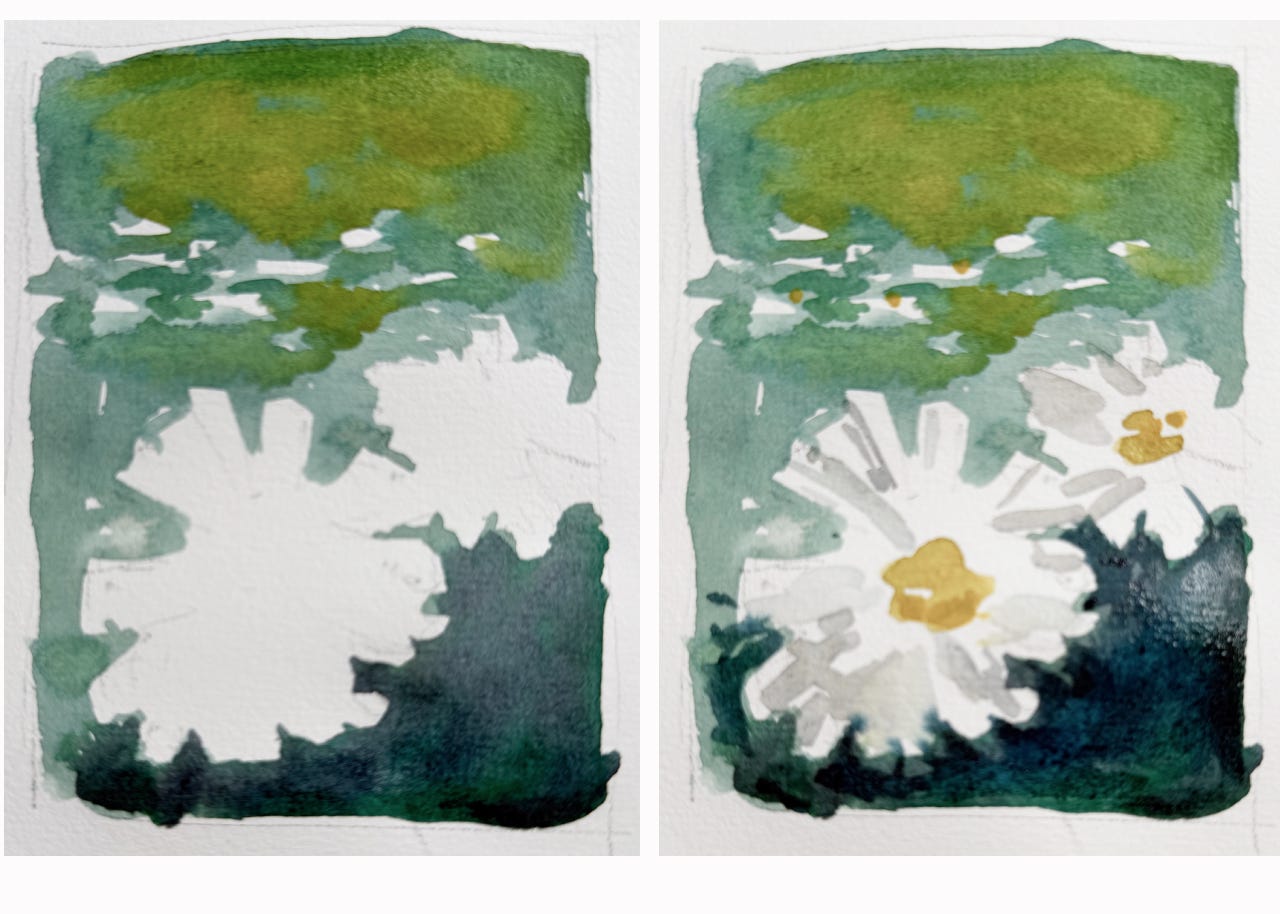
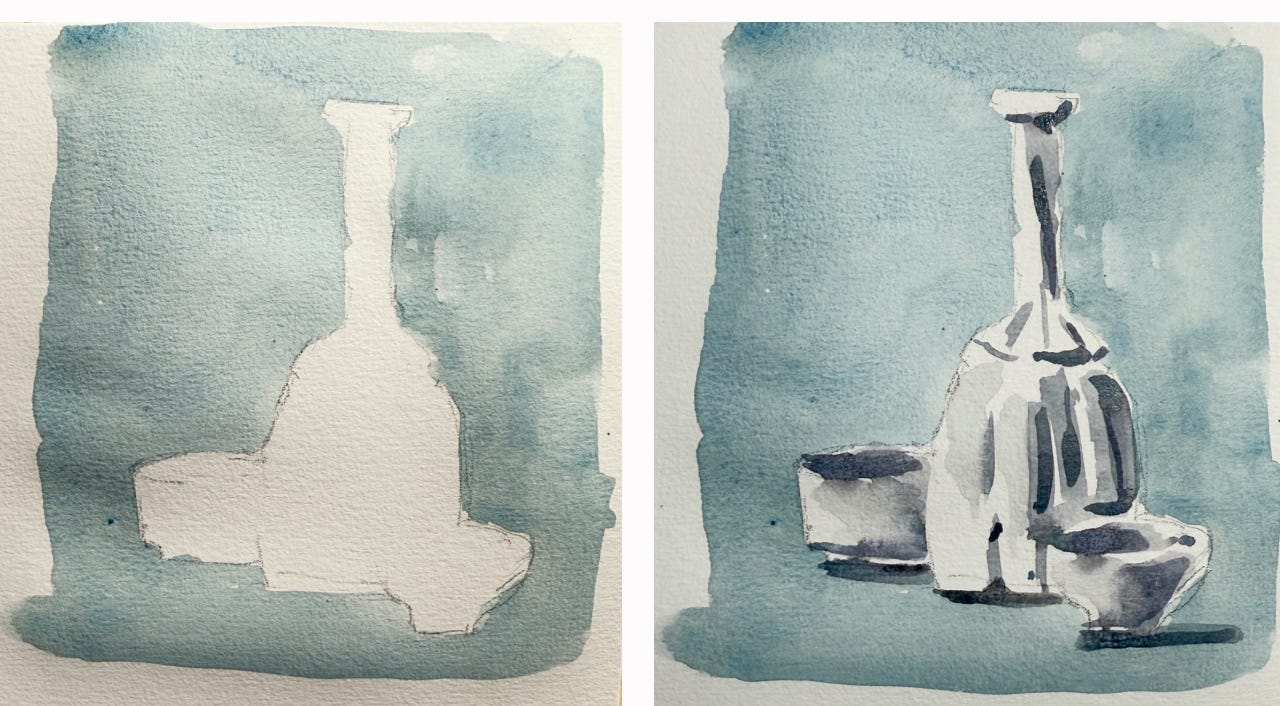
Paint the negative first: Let the objects remain as white shapes at first, emerging from the negative space. If you want, add some subtle shading to the objects
Why
Sharpen your observation skills: learning to see the shapes around objects helps you break free from default thinking of what objects should look like
Better composition: Negative shapes add balance, structure, and visual interest to your paintings by focusing on the "in-between" spaces
Preserving whites: the best way to create light is to leave white paper. I rarely use masking fluid, and prefer to paint around things.
Examples
In my first example, I painted two daisies. The flowers emerged purely from painting the background between them.
For the second example, I drew inspiration from Giorgio Morandi (more on him below), creating a simple still life defined solely by painting the space around them first.
Bonus Content
Video Demo of example 3
How 2 famous Masters used negative painting
More practice ideas
